
July 7 2021
Taking the perfect photo takes some time to perfect and perhaps a little bit of education. It is much more complicated than point and press the trigger release button! When I first purchased a DSLR, I only dared to use it in the AUTO mode. I had no idea how to create the correct exposure with the other buttons on my camera.
I learned how the exposure triangle works from a lovely photographer, Estelle. I took a course at a local church’s mom’s group and she told me at the beginning of the class on that first week that by the end of the 8 weeks, I would not be photographing in Auto mode, but using my camera to its fullest capabilities in Manual mode. I didn’t believe her :).
As it turns out, she was right! I learned, practiced and practiced, kept learning and playing around with the setting on my camera. Now I am confident in creating an image with great exposure while on the MANUAL mode!

Understanding Light
To understand what and how to achieve the perfect exposure, one must understand light. As the photographer, it is my job to control the amount of light hitting the sensor. To do this, I need to adjust the ISO, aperture and/or shutter speed according to not only the light that is available, but also according to the type of photo I am wanting to produce.
ISO, aperture and shutter speed make up what is called the exposure triangle. These three elements affect the light of the photograph and individually they can create different effects.
There are so many things to talk about when talking about light. Simple concepts like intensity or brightness of the light, the duration of the light source (ie flash), vs continuous light are easy to understand. There are more complicated concepts like the inverse square law which explains how distance affects light. But for now, I will just stick to the three elements in the triangle and how they can be used to create great exposure and also some fun affects.
ISO
Lets start with ISO. This stands for International Organization for Standardization. In basic terms, the ISO is setting that can brighten the image or darken it. Back in the day of film, you could purchase film with different set speeds-100, 200, 400, etc. The higher the number, the more sensitive the film was to light. When digital cameras came on the scene, the numbering system remained the same so that by increasing the ISO, the image will become brighter.
Increasing the ISO comes in handy when the lighting conditions are less than ideal. How do I know how much to increase the ISO? It’s pretty simple especially with my mirrorless camera (that’s for another post!). Basically, when you double your ISO speed, you are doubling the brightness of the photo. So, a photo at ISO 400 will be twice brighter than ISO 200, which will be twice brighter than ISO 100.
The advantage of the digital camera over film is that the sensitivity of the sensor can be changed for every image. There is a specific button on my camera that I can press and quickly change the sensitivity for every image if I wanted to. Contrasting to the film, where the ISO had a fixed value with every image. Increasing the ISO is not only a great way to lighten images in low light situations but also can be used when I want to use a faster shutter speed to capture motion.
The unfortunate side effect of a high ISO is the grain, or digital noise, that will be introduced into the image. The higher the ISO, the more noise there will be. Check out these two photos below of our dog, Piper:
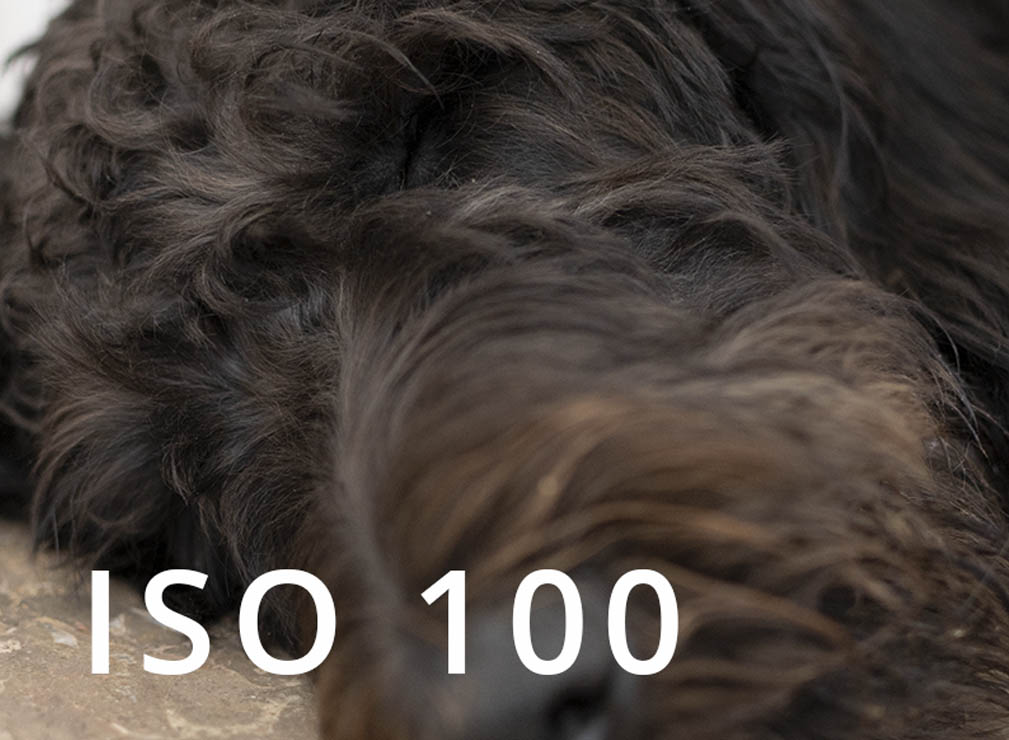
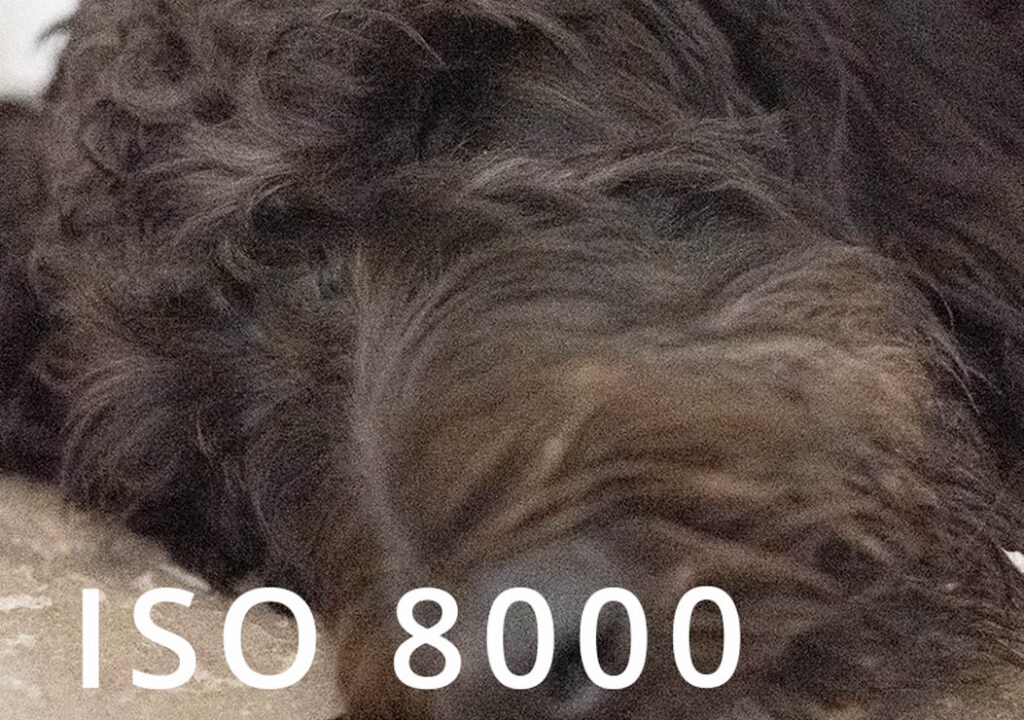
Notice the grainy look, or the digital noise in the image with ISO 8000. The grain can be more subtle than this, but it is still noticeable when comparing the two photos.
Depending on the type of photo you want to create, the noise can be a benefit to the texture and feel of an image and you can make the grain work toward a certain artistic effect. However, it is also personal preference. I mainly photograph portraits of people and pets, and it is my preference to have as little grain as possible in my images. My rule of thumb is to have the lowest ISO I can for the lighting conditions.
Shutter Speed
The next element in the exposure triangle is the shutter speed. This is the amount of time that the camera’s shutter is open, allowing light to pass through the lens to hit the digital sensor. The longer the shutter is open, the more light comes through. If you double the amount of time that the shutter is open, you will double the amount of light coming in.
Shutter speeds on the digital cameras are listed as whole seconds or as fractions of a second. The maximum shutter speed for most SLR cameras is 30 seconds. You can take a photo with longer than 30 seconds, but you have to use a special function on the camera called bulb (B). This allows the shutter to be open as long as the shutter release button is depressed.
Just like with aperture and ISO, there are some “side effects” of shutter speed.
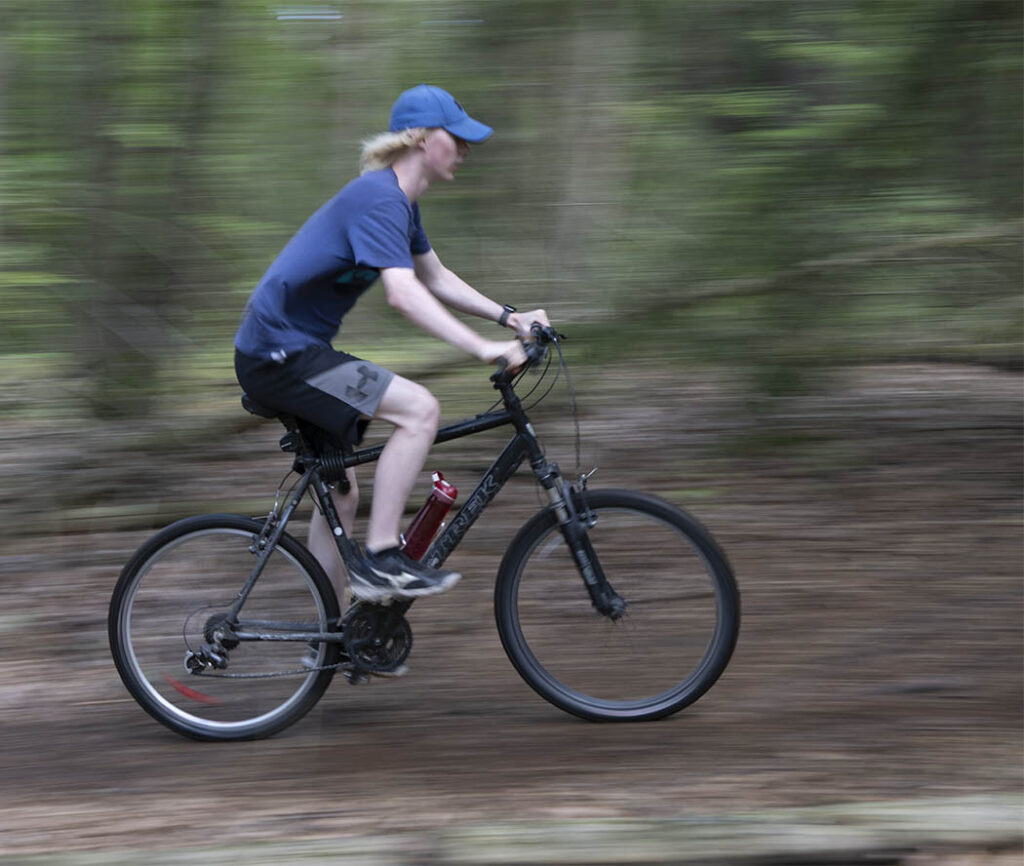
Slow shutter speeds allow movement to be imaged across the photograph. This can include both movement of the subject and movement of the background. It can be fun to experiment with different shutter speeds to see the different images that can be produced.
While camping, I had my nephew bike up and down in the biking trails of Turkey Point Provincial Park while I changed the shutter speed. In the first photo, I used a slower shutter speed of 1/25s. While focusing on the biker, I scanned the camera in the same direction he was going. The result is a still image of Ryan while the blurry background creates the movement effect.
For this next image, I used a high shutter speed of 1/8000s. This results in a crisp image of both Ryan and the background.
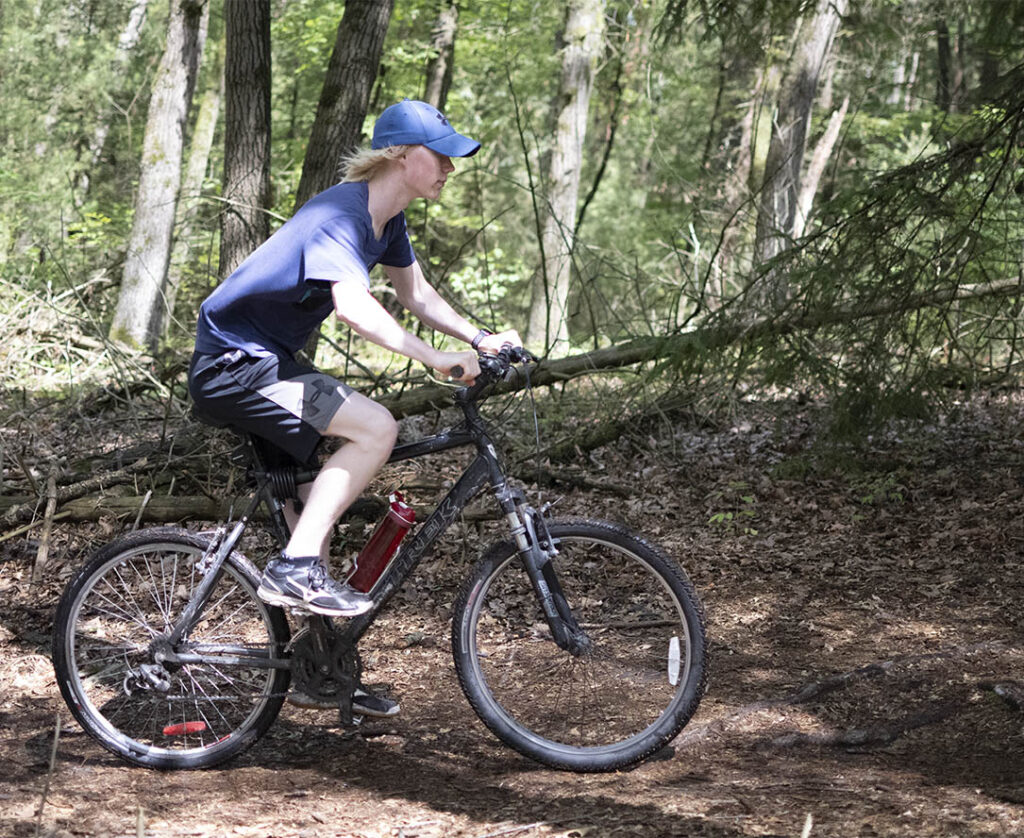
Can you still detect movement in the photo? Notice the way his hair is blowing in the wind.
One of the negative side effects of a slow shutter speed is camera shake. It is nearly impossible to hold a camera perfectly steady for any length of time, especially for a few seconds. You definitely need to keep this in mind when using a slower shutter speed and expect to have blur from camera shake if you are not using a tripod.
Aperture
The last element in the exposure triangle that I will discuss is the aperture. This is the size of the opening of the lens. The circular opening, often compared to the pupils in the eyes, can be opened or closed and controls the amount of light entering the lens. The aperture is quantified by f-stops. It is a ratio of the opening of the lens compared to the focal length of the lens. An aperture of f2 has a much wider opening than an aperture of f22. There is a much more complicated explanation out there, using the inverse square law (you can Google it, if you want more info), but simply speaking, the smaller the number, the wider the opening and the more light is allowed to pass through.
There are two side effects when one changes the aperture. The first one was already talked about briefly-opening up the aperture will allow more light in, thereby creating a brighter image.
The second side effect is the change in the depth of field. Depth of field is defined as the amount of distance between the nearest and farthest objects that appear to be sharply in focus in an image. By controlling the depth of field in an image, it can add dimension.
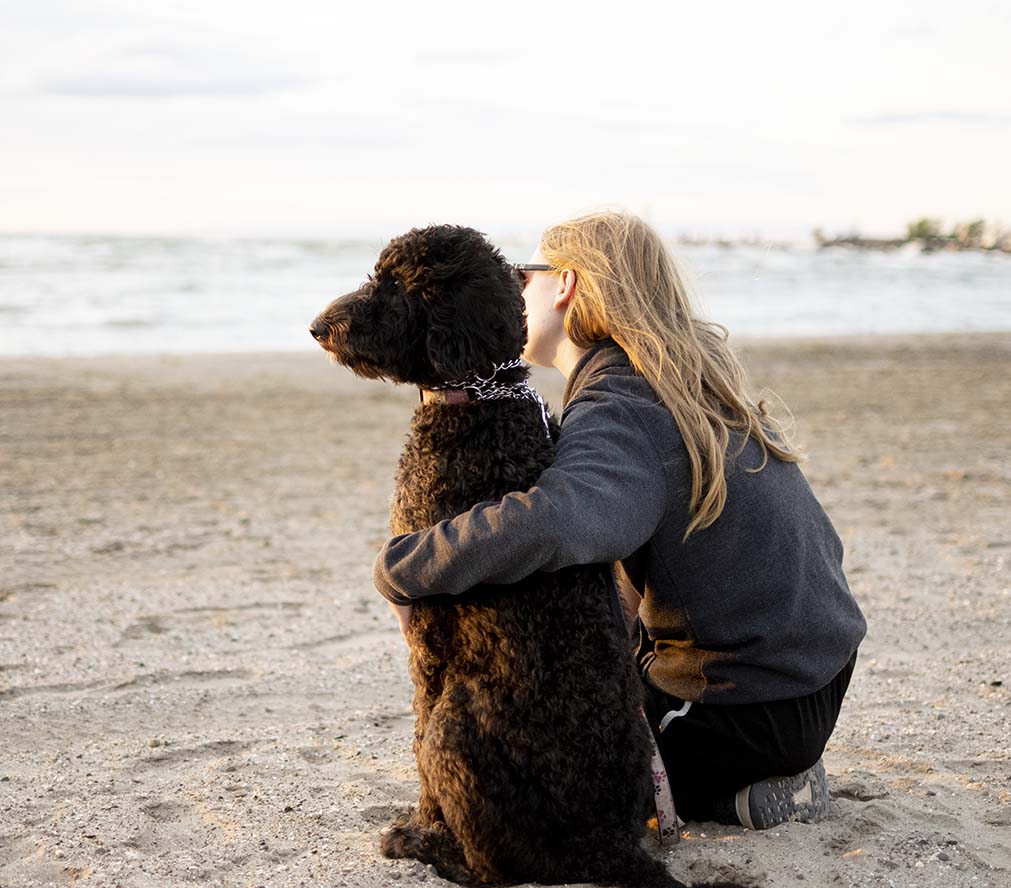
You can have a shallow depth of field, like the photo below, that produces a blurred background. This is typical to my style of portraits-I love the blurred backgrounds, demanding the focus to be on the subject. This image was taken with f1.8 aperture.
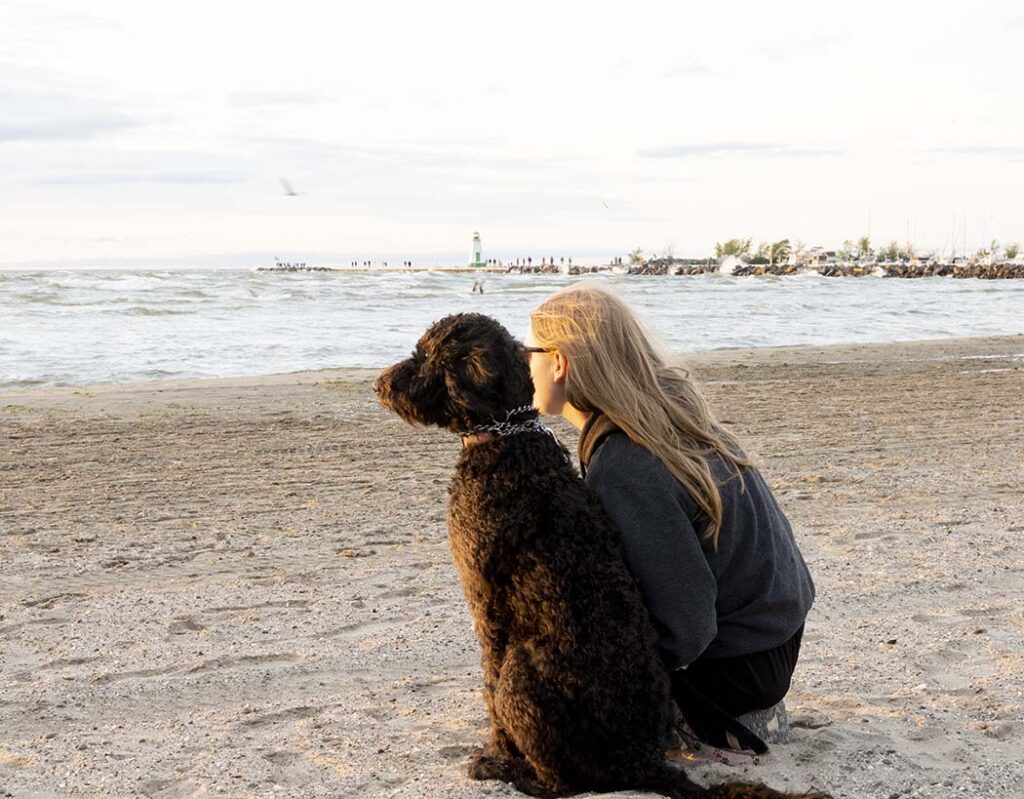
In contrast, if you have a large depth of field, it allows are large range of the image to be in sharp focus, as in the photo below. This photo was taken with an aperture of f11. This is still a beautiful image as you can see the pier and the lighthouse in the background-almost like it’s a painting. As with most images in photography, there is no right or wrong way to take a photo-(unless it’s blurry, blurry is a no-no!)-it’s completely up to the photographer and what type of image he/she is trying to create.
In summary, when the aperture is set to f2, a large opening, this will produce that soft blurry background, while closing the aperture to f22 will have more of the entire image in focus as in a landscape image.
I’m curious to know which do you like better? Comment below in the comment section. There is no right or wrong answer here :).
I hope you have a better appreciation to the thought that goes into each and every image and why it might take a bit longer than you might expect to set up the photo. This is why you may hear me say to you: “Give me a minute as I adjust the light”.
To book your next photo session, please email me at michelle@mlphotography.camera.
Check out more photographs on my website.